Taccoform Tutorial Series - Part I

Overview
You’ve reviewed the CNCF Landscape and have decided that you need to start somewhere. You close your eyes and randomly click one of the logos. You open your eyes and see a weird T logo with the name “Hashicorp Terraform.” This is how I got started with Terraform.
After 4 years of mostly learning what not to do, I decided to help others on their cloud journey. If you know how to use github and a little bit of bash, I will teach you how to provision servers in the cloud with Infrastructure as Code. We’re going to be working with DigitalOcean, but the principles learned here can be used across all cloud providers. This is the first entry in the Taccoform Tutorial Series.
Lesson 1
Alright, first we need to do a bit of setup. We need to create a DigitalOcean account, configure an SSH key, and fork a repo. After that we can start talking about terraform, build something, and destroy it when we’re done.
Pre-Flight
Create a DigitalOcean Account
- Create a DigitalOcean account DigitalOcean Free Credit Referral Link
- Create a Personal Access Token (DigitalOcean Control Panel: Left pane>Account>API>Personal access tokens>Generate New Token)
- Give the Personal Access Token Read and Write access
- Add this token to your password manager. Please look into a password manager if you don’t currently use one.
Create new SSH key for Digital Ocean droplets
- In terminal run:
ssh-keygen -t ed25519 -C "[email protected]" - When it asks you for a place to save the key, use the suggested path, but update the filename to be
do_ed25519, eg./home/johndoe/.ssh/do_ed25519(replacingjohndoewith your username) - Next create a passphrase for the key and confirm it a second time.
- Run
cat /Users/johndoe/.ssh/do_ed25519.pub(replacingjohndoewith your username)- Copy output to clipboard
- Go back to the DigitalOcean control panel and browse to
Accounts>Settings>Security>SSH keys- Press the “Add SSH Key” button and paste the contents of
do_ed25519.pubinto the SSH key content field and give the key the nametaccoform-tutorial
- Press the “Add SSH Key” button and paste the contents of
Fork and clone the Taccoform Tutorial repo
- Go to the Taccoform Tutorial Repo, fork the repo and clone it to your computer.
- Open the repo with your favorite IDE. If you don’t have one, I’d suggest taking a look at Microsoft’s VSCode. It’s a pretty nice product and free.
Terraform Files
Terraform file basics:
- Terraform files end with
.tf - Terraform will only read
.tffiles that live the same directory (usually) - Terraform files contain a mix of variables, data resource lookups, and resource definitions.
Create a Secrets file
You don’t want to post your digital personal access token on github, so I’ve added secrets.tf to the .gitignore file. If you’re working out of your own repo, please add secrets.tf to your .gitignore file.
- Navigate to
tutorial-1>app - Create a new file called
secrets.tf - In the
secrets.tffile, create a new terraform variable for your DigitalOcean key:
variable "do_token" {
  description = "DigitalOcean personal access token"
  default     = "lfj312lfjh2lfh1orh1fl1jth2jlhga"
}
Note: Replace the default value with your DigitalOcean personal access token
Provider file
The instructions in the provider.tf file is a heads up of sorts which tells Terraform “Wake up! Expect to communicate with these cloud providers!” As you can see, there are some pre-configured settings on how to connect to DigitalOcean
User Data template
In the templates folder you will find a user data file. This file is passed to the droplet (or virtual machine) as instructions on how to configure the operating system after it boots up. This might be the easiest way to automatically configure a droplet, but there are other methods which have their own sets of pros and cons.
user_data_nginx.yaml
#cloud-config

packages:
    - nginx

runcmd:
    - [hostname, ${hostname}]
    - echo "<html><body><h1>${hostname} IS ALIVE!!!</h1></body></html>" | tee /var/www/html/index.nginx-debian.html
    - [systemctl, reload, nginx]
| Component | Description |
|---|---|
#cloud-config |
Tells DigitalOcean that configuration instructions are incoming |
packages |
A heading to install linux applications on the droplet |
runcmd |
Allows you to run arbitrary bash commands during the first boot of the droplet |
Here are a few resources that dig deeper into cloud-config/cloud-init/user-data:
Droplet file
As you can see, the droplet.tf file is empty right now, you will now start to write your first bit of terraform.
In the pre-flight, you created an SSH key and uploaded it to DigitalOcean. If you want to load that SSH key onto a new droplet, you will need to perform a lookup on DigitalOcean to find that key. In Terraform-land this is known as a “data resource.” Below you will see the data resource lookup which is needed prior to creating the droplet. Add this definition to your droplet.tf file
Note: don’t copy/paste the code below. Write it on your own to get a feel for writing Terraform
data "digitalocean_ssh_key" "root" {
  name = "taccoform-tutorial"
}
| Component | Description |
|---|---|
| data | tells terraform that the following resource is a lookup |
| digitalocean_ssh_key | is a unique name created by the DigitalOcean provider which allows you to pull in SSH keys |
| root | a static name give by you and can be anything, but it’s better when it’s more specific. In this case, we’re referencing the droplet’s “root” account |
| name | a parameter which is allowed by the digitalocean_ssh_key data resource. More information on this data resource can be found here |
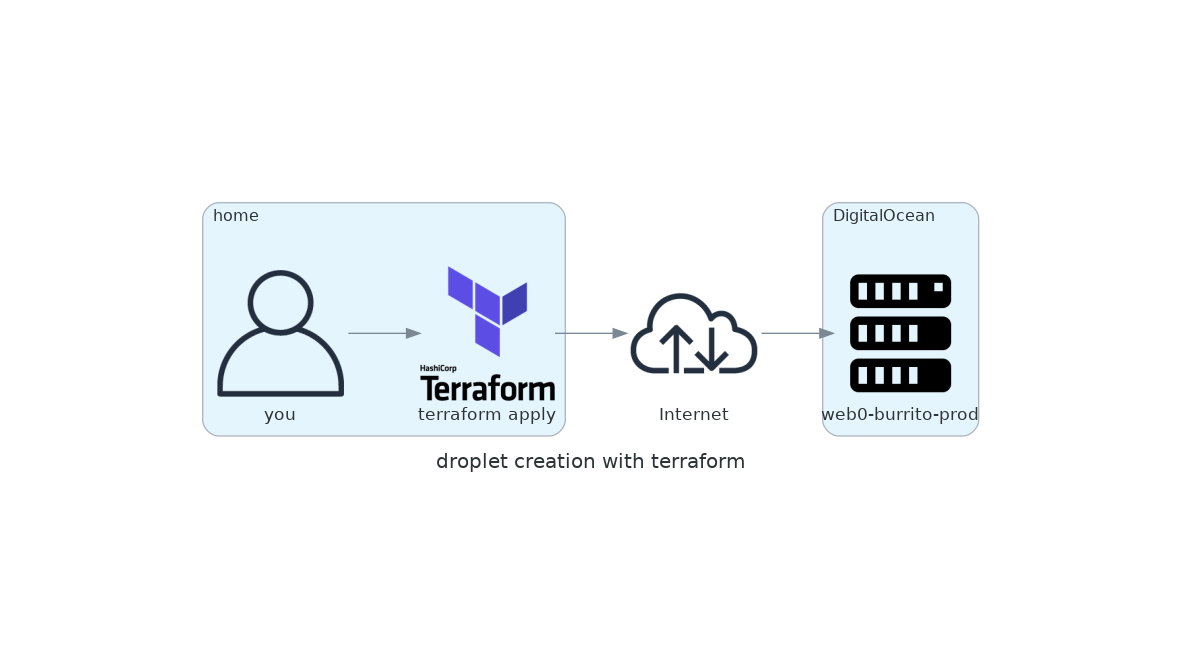
Now it’s time to actually create the droplet. You will do this by creating a droplet resource definition.
Note: don’t copy/paste the code below. Write it on your own to get a feel for writing Terraform
resource "digitalocean_droplet" "web" {
  image     = "ubuntu-20-04-x64"
  name      = "web-burrito-prod"
  region    = "sfo2"
  size      = "s-1vcpu-1gb"
  ssh_keys  = [data.digitalocean_ssh_key.root.id]
  user_data = templatefile("templates/user_data_nginx.yaml", { hostname = "web-burrito-prod" })
}
| Component | Description |
|---|---|
| resource | tells terraform that the following definition is something that needs to be created |
| digitalocean_droplet | a unique name created by the DigitalOcean provider which creates a droplet |
| web | a static name given by you and can be anything, but it’s better when it’s more specific |
| image | a DigitalOcean supported operating system (required) |
| name | a unique name provided by you. I prefer to use the format NodeType-ServiceName-Environment (required) |
| region | a unique location provided by DigitalOcean (required) |
| size | a unique code provided by DigitalOcean to tell terraform how big of a droplet needs to be provisioned. The size defined is the smallest server offering by DigitalOcean and is $5/month. We’re going to destroy the droplet at the end of the tutorial, so your bill will be less than that. (required) |
| user_data | the set of instructions on what to do after the operating system has been installed. Of note here is that we’re using the template function to call the file from the templates folder and pass through the hostname variable. |
After defining the droplet, you want to add an ouput for the droplet’s public IP address. This will make it easy for you to retrieve the IP address to plug into your browser.
output "droplet_public_ip" {
  value = digitalocean_droplet.web.ipv4_address
}
| Component | Description |
|---|---|
| output | this tells terraform that you want to display a parameter or variable |
| droplet_public_ip | a unique name given by you to make it easy to understand what is being displayed |
| value | the key used to define what your output will be |
| digitalocean_droplet.web.ipv4_address | an available attribute from the droplet you defined earlier |
Note: Attributes are unique outputs created by the people who maintain their respective terraform providers. More attributes for the DigitalOcean droplet resource can be found here.
Terraform Installation and Commands
Install Terraform
Mac OS
- Open terminal
- Install Brew:
/bin/bash -c "$(curl -fsSL https://raw.githubusercontent.com/Homebrew/install/master/install.sh)" - Install Hashicorp tap:
brew tap hashicorp/tap - Install Terraform:
brew install terraform
Windows
- Open terminal app
- Install Chocolatey:
Set-ExecutionPolicy Bypass -Scope Process -Force; [System.Net.ServicePointManager]::SecurityProtocol = [System.Net.ServicePointManager]::SecurityProtocol -bor 3072; iex ((New-Object System.Net.WebClient).DownloadString('https://chocolatey.org/install.ps1')) - Install Terraform:
choco install terraform
Install Verification
- Verify terraform has been installed by running
terraform version
- Sample output:
Terraform v0.13.1
+ provider registry.terraform.io/digitalocean/digitalocean v1.22.2
Note: you should be running Terraform 0.13.x
Terraform Commands
| Command | Description |
|---|---|
terraform init |
This initializes terraform (duh) which means it pulls in the provider information, downloads any modules that are referenced in the code and configures the terraform statefile |
terraform plan |
This is a dry-run feature of terraform to see what would happen if you executed the provisioning based on what’s in the code and in your terraform statefile |
terraform apply |
This executes the provisioning or destruction of resources based on what is in your code and the terraform statefile |
terraform destroy |
This is a pretty well named subcommand. It will destroy everything you’ve provisioned |
Run Terraform
- In terminal, navigate to
tutorial-1>appin thetaccoform-tutorialrepo that you forked and cloned - Run
terraform init
- Your output should look like the sample below:
  Initializing the backend...

Initializing provider plugins...
- Using previously-installed digitalocean/digitalocean v1.22.2

Terraform has been successfully initialized!

You may now begin working with Terraform. Try running "terraform plan" to see
any changes that are required for your infrastructure. All Terraform commands
should now work.

If you ever set or change modules or backend configuration for Terraform,
rerun this command to reinitialize your working directory. If you forget, other
commands will detect it and remind you to do so if necessary.
- Now run
terraform plan
- Sample output below:
Refreshing Terraform state in-memory prior to plan...
The refreshed state will be used to calculate this plan, but will not be
persisted to local or remote state storage.

data.digitalocean_ssh_key.root: Refreshing state...

------------------------------------------------------------------------

An execution plan has been generated and is shown below.
Resource actions are indicated with the following symbols:
  + create

Terraform will perform the following actions:

  # digitalocean_droplet.web will be created
  + resource "digitalocean_droplet" "web" {
      + backups              = false
      + created_at           = (known after apply)
      + disk                 = (known after apply)
      + id                   = (known after apply)
      + image                = "ubuntu-20-04-x64"
      + ipv4_address         = (known after apply)
      + ipv4_address_private = (known after apply)
      + ipv6                 = false
      + ipv6_address         = (known after apply)
      + ipv6_address_private = (known after apply)
      + locked               = (known after apply)
      + memory               = (known after apply)
      + monitoring           = false
      + name                 = "web-burrito-prod"
      + price_hourly         = (known after apply)
      + price_monthly        = (known after apply)
      + private_networking   = (known after apply)
      + region               = "sfo2"
      + resize_disk          = true
      + size                 = "s-1vcpu-1gb"
      + ssh_keys             = [
          + "28662501",
        ]
      + status               = (known after apply)
      + urn                  = (known after apply)
      + user_data            = "6ea4456823de5c1b3b50b4e3d151c442d5231234"
      + vcpus                = (known after apply)
      + volume_ids           = (known after apply)
      + vpc_uuid             = (known after apply)
    }

Plan: 1 to add, 0 to change, 0 to destroy.

Changes to Outputs:
  + droplet_public_ip = (known after apply)
- You can now see what terraform will be provisioning
- The
Planline is key for deciding if terraform is going to perform the changes you’re expecting. - It’s always a good idea to review the plan prior to executing the change
- After reviewing the plan’s output, run
terraform apply
- You will see a similar output to the plan and will be prompted to confirm the change:
Plan: 1 to add, 0 to change, 0 to destroy.

Changes to Outputs:
  + droplet_public_ip = (known after apply)

Do you want to perform these actions?
  Terraform will perform the actions described above.
  Only 'yes' will be accepted to approve.

  Enter a value:
- If it all looks good, confirm by entering
yesand pressing enter
- Sample output below
  Enter a value: yes

digitalocean_droplet.web: Creating...
digitalocean_droplet.web: Still creating... [10s elapsed]
digitalocean_droplet.web: Still creating... [20s elapsed]
digitalocean_droplet.web: Still creating... [30s elapsed]
digitalocean_droplet.web: Creation complete after 35s [id=211687049]

Apply complete! Resources: 1 added, 0 changed, 0 destroyed.

Outputs:

droplet_public_ip = 1.2.3.4
-
After the
applyhas completed, you can take thedroplet_public_ipand browse to it (eg. http://1.2.3.4) -
Even though the terraform process has completed, DigitalOcean is still provisioning the droplet with the help of the
user_data_nginx.yamlwe specified in the resource definition -
After a minute of furiously refreshing the page, you should see the default Nginx page. After another ~30 seconds, refresh the page. The user data script should have completed and you should now see “web-burrito-prod IS ALIVE!!!”
-
Now you can ssh into the new droplet with
ssh -i ~/.ssh/do_ed25519 [email protected](replace 1.2.3.4 with yourdroplet_public_ip)- You will be prompted to continue connecting, type
yesthen press enter - Now you’ll be prompted for the passphrase you created for the
do_ed25519key - After submitting the passphrase, you should see the prompt:
root@web-burrito-prod:~# - You can review the output of the
user_datascript by runningcat /var/log/cloud-init-output.log - Once you’re done, run
exit
- You will be prompted to continue connecting, type
-
You can also log into the DigitalOcean control panel to check out your droplet
Destroying the droplet
After you’ve shown a loved one and they say “that’s very nice, but I’m busy right now”, it’s time to destroy the droplet.
- Run
terraform destroy
- You should see something similar to the output below:
An execution plan has been generated and is shown below.
Resource actions are indicated with the following symbols:
  - destroy

Terraform will perform the following actions:

  # digitalocean_droplet.web will be destroyed
  - resource "digitalocean_droplet" "web" {
      - backups              = false -> null
      - created_at           = "2020-10-11T18:49:21Z" -> null
      - disk                 = 25 -> null
      - id                   = "211687049" -> null
      - image                = "ubuntu-20-04-x64" -> null
      - ipv4_address         = "1.2.3.4" -> null
      - ipv4_address_private = "10.10.0.2" -> null
      - ipv6                 = false -> null
      - locked               = false -> null
      - memory               = 1024 -> null
      - monitoring           = false -> null
      - name                 = "web-burrito-prod" -> null
      - price_hourly         = 0.00744 -> null
      - price_monthly        = 5 -> null
      - private_networking   = true -> null
      - region               = "sfo2" -> null
      - resize_disk          = true -> null
      - size                 = "s-1vcpu-1gb" -> null
      - ssh_keys             = [
          - "28662501",
        ] -> null
      - status               = "active" -> null
      - tags                 = [] -> null
      - urn                  = "do:droplet:123456789" -> null
      - user_data            = "6ea4456823de5c1b3b50b4e3d151c442d1234567" -> null
      - vcpus                = 1 -> null
      - volume_ids           = [] -> null
      - vpc_uuid             = "f7eaa123-e123-4123-a123-a7cf99e08123" -> null
    }

Plan: 0 to add, 0 to change, 1 to destroy.

Changes to Outputs:
  - droplet_public_ip = "1.2.3.4" -> null

Do you really want to destroy all resources?
  Terraform will destroy all your managed infrastructure, as shown above.
  There is no undo. Only 'yes' will be accepted to confirm.

  Enter a value:
The output shows you what will be destroyed. We’re expecting to destroy 1 droplet resource and that’s what it is telling us.
- Type
yesand press enter to start the destruction
- Your output should be similar to the output below:
  Enter a value: yes

digitalocean_droplet.web: Destroying... [id=123456789]
digitalocean_droplet.web: Still destroying... [id=123456789, 10s elapsed]
digitalocean_droplet.web: Still destroying... [id=123456789, 20s elapsed]
digitalocean_droplet.web: Destruction complete after 23s

Destroy complete! Resources: 1 destroyed.
After the terraform destroy has finished, don’t forget to commit your changes to github.
In Review
- Set up your DigitalOcean account
- Configured a droplet SSH key
- Learned about
.tffiles - Created your first resource definition
- Installed Terraform
- Learned about Terraform init/plan/apply
- Provisioned via the Terraform command
- SSH’d into the newly provisioned droplet
- Destroyed the droplet
Check out the next entry in the Taccoform Tutorial Series, which will cover count, for_each, and how to keep your code “DRY”
Feel free to reach out on twitter via @taccoform for questions and/or feedback on this post